The 6 Stages of App Development - Part 1
With each business that comes to us with an idea for an app or a problem they are facing, we tend to approach designing and building the solution in a similar way. Methodically breaking things down helps us articulate timescales as well as keep track of where we’re heading with development.
Each project is unique and requires flexibility within this loose framework. In a lot of cases we’ll collaborate with third parties to complete all or part of a stage. Sometimes the plan will change mid-way through development and we’ll adapt by revisiting a previous stage or cycling through a number of them for a few iterations. Nothing is nailed down, but hopefully this will give you an insight into the milestones a lot of our projects pass in the lead-up to release.
Stage 1 - The Problem/Idea
Before we can start thinking about a software solution, it’s important to really get our heads around what it is we’re solving. In a lot of cases, companies come to us with a pretty clear idea of what they want building. We like to get together and discuss the motivation behind the project in detail before we get started for a number of reasons:
- We need to understand your business to appreciate how the problem affects you and what kind of software would be appropriate.
- What one person perceives to be the problem might not always turn out to be the thing that needs addressing directly. You know your business better than anyone, but sometimes it takes an outsider to tease out the root cause or a higher-level issue that can be overlooked in the day-to-day running of a company.
- Sometimes the vision for an app is just not feasible (especially within budget and time constraints). Equally, there might be a solution you hadn’t considered possible. As technical experts we can help analyse the problem in the context of what apps, and the platforms they run on, are capable of.
Stage 2 - Feature Design
Once we have nailed down the problem or need that our application is going to address, we can start designing a solution. Is it going to run natively on a mobile or in a web browser? What operating systems should be supported? Exactly what will users be able to do with the software?
In almost every case, we suggest reducing the scope of an application right down to the bare essentials and focusing on getting those few features right for a first release. This is called a Minimum Viable Product (MVP) and allows us to get something useful into people’s hands as soon as possible. That way, users can benefit from our solution and we get valuable feedback to guide further development, informing decisions and saving money in the long run.
Stage 3 - Interaction Design
Now we know what form the software is going to take and what the first version will do, we can start considering how users will interact with it, commonly referred to as User Experience (UX). To do this, we tend to produce ‘wireframes’ - low-fidelity mockups of the different views the application might have and how the user will get from one to the other while completing a task. While only made up of boxes, lines and text, the wireframes are coupled with notes on how elements might react to user actions.
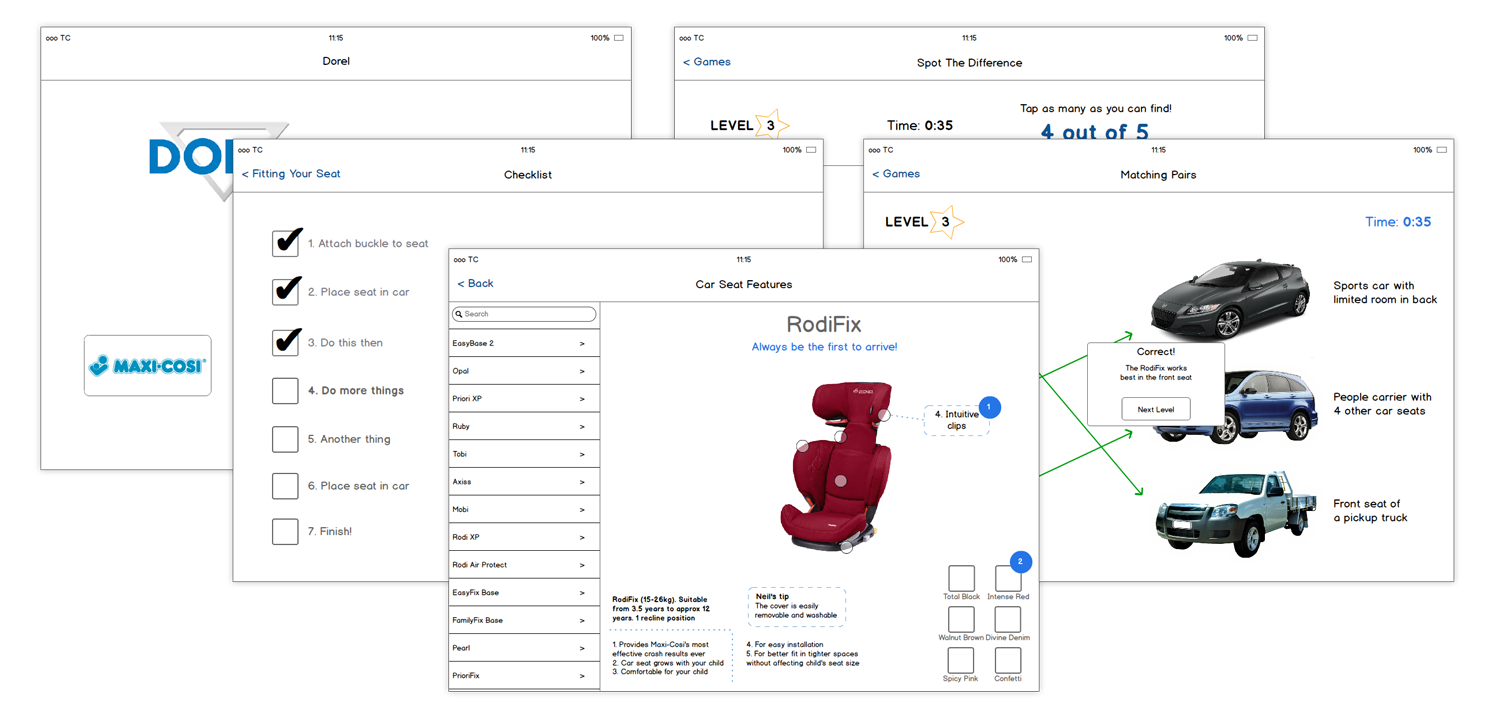
After plenty of iteration with the client, the wireframes should eventually provide a complete overview of the layout of the application. They should be detailed enough to demonstrate how a user would navigate the software to complete any task we have chosen to cover in our MVP.
That’s all for part one. In part two I’ll cover visual design, programming and testing.